Week 4: Microcontroller programming
For this week's project, I was eager to use the "tone" function to create a small button-based keyboard using Arduino. My goal was to program the ItsyBitsy to create a series of pitches assigned respectivly to a series of buttons. While my goal was only to create 3 buttons (in order to play the notes "a" "b" and "e") I hoped that the project would be easily scalable into a larger keyboard. All the pitches are being played back on a small piezo buzzer.
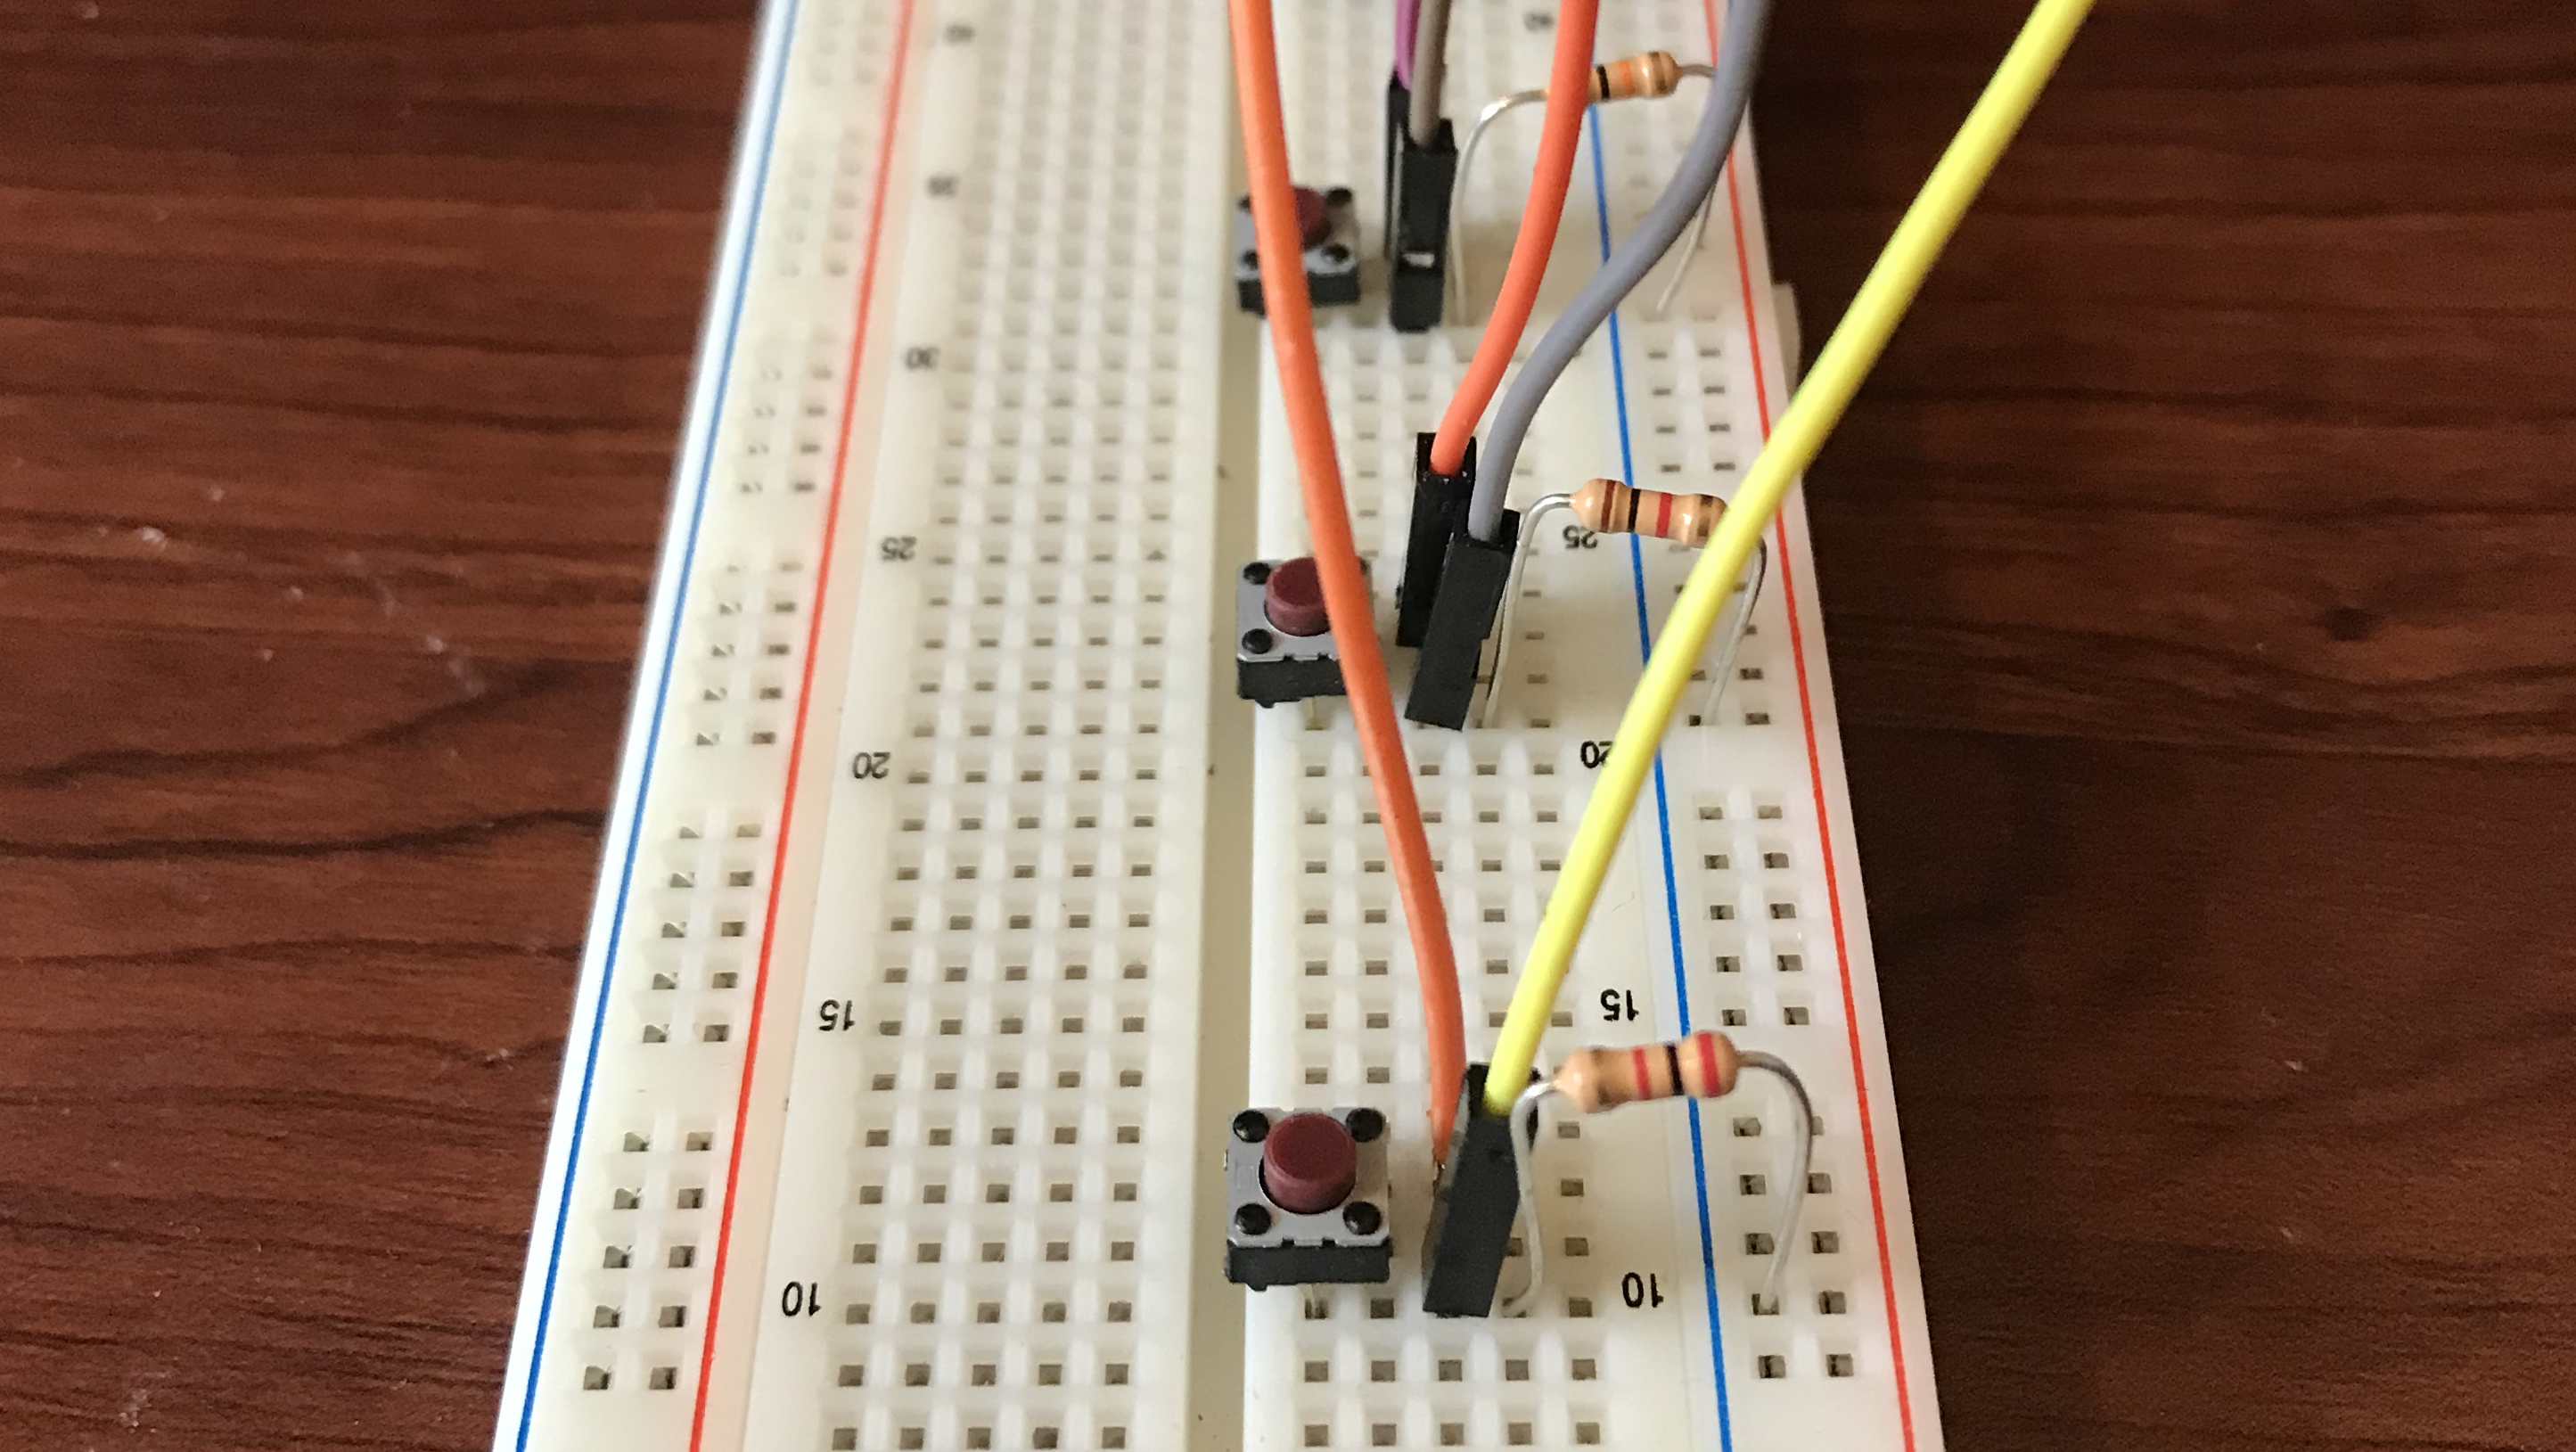
The keyboard uses 4 switches (I added one so that I could play a slightly more complex melody for my demo) each with a pulldown resistor. The switches are run into digital pins 2, 3, 4, and 5, all set as imputs. The buzzer runs from digital pin 9, set as an output.
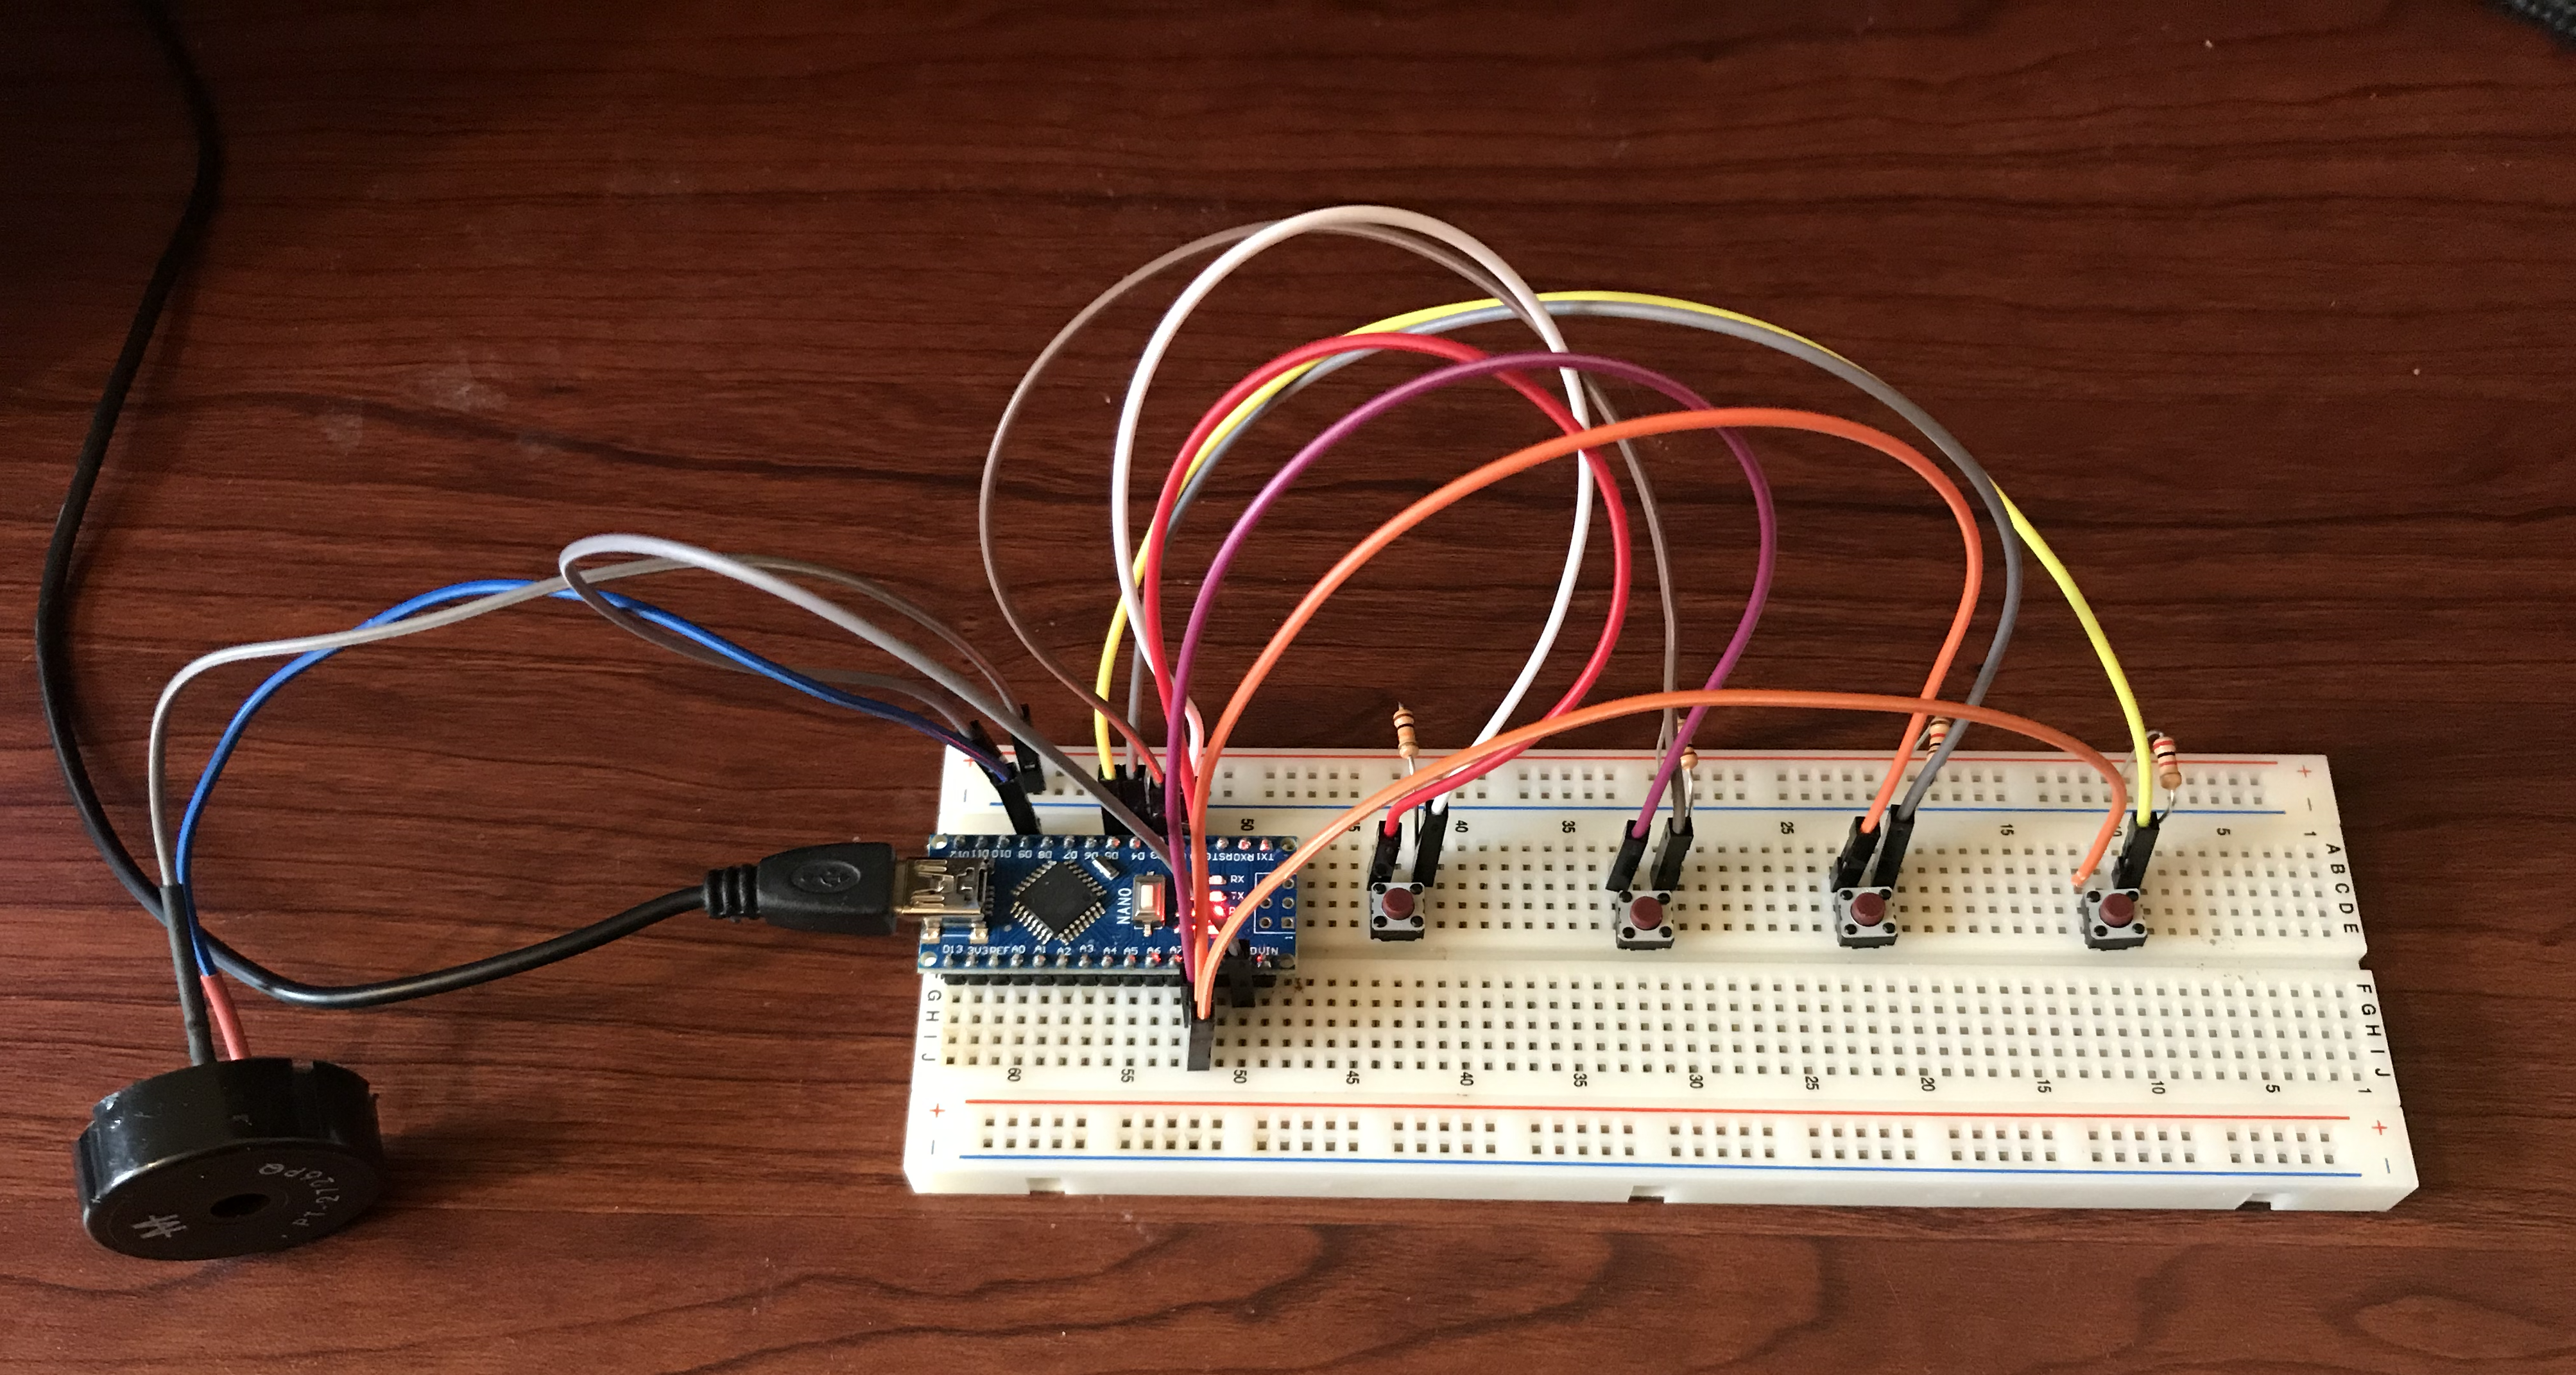
In the next photo, the orange wire runs from the 5v output of the Nano to the Switch, the yellow wire runs to digital pun 5, and the resistor connects from the switch to the ground in order to pull down any floating current.
The code I wrote for this 4 button keyboard is as follows.
  // setting the pin numbers//
    const int buttonPin1 = 2;     // key 1 //
    const int buttonPin2 = 3;     // key 2 //
    const int buttonPin3 = 4;     // key 3 //
    const int buttonPin4 = 5;     // key 4 //
    const int buzzerPin = 9;      // buzzer output //

  // defining the original pin states //
    int buttonState1 = 0;         // variable for reading key 1 status //
    int buttonState2 = 0;         // variable for reading key 2 status //
    int buttonState3 = 0;         // variable for reading key 3 status //
    int buttonState4 = 0;         // variable for reading key 4 status //

void setup() {
  // setting buzzerPin as output //

    pinMode(buzzerPin, OUTPUT);

  // setting button pins as imputs //
    pinMode(buttonPin1, INPUT);
    pinMode(buttonPin2, INPUT);
    pinMode(buttonPin3, INPUT);
    pinMode(buttonPin4, INPUT);
}

void loop() {
  // read the state of the button value //
    buttonState1 = digitalRead(buttonPin1);
    buttonState2 = digitalRead(buttonPin2);
    buttonState3 = digitalRead(buttonPin3);
    buttonState4 = digitalRead(buttonPin4);

  if (buttonState1 == HIGH) {
   tone(buzzerPin, 440);        //equal tempered A//
  }
  else  if (buttonState2 == HIGH) {
    tone(buzzerPin, 523.25);    //equal tempered C//
   }
  else if (buttonState3 == HIGH) {
    tone(buzzerPin, 587.33);    //equal tempered D//
  }
  else if (buttonState4 == HIGH) {
    tone(buzzerPin, 659.25);    //equal tempered E//
  }
  else{
    noTone(buzzerPin);
  }
}
Having learned from the Arduino website that one challenge the "tone" function poses is that it will not fire a tone command until the previous tone command has been ended by a "noTone" function, I initially wrote my "if" and "else" functions with a "noTone" called for every pitch. When only one button was pressed, no sound was produced, and when both buttons were pressed, the buzzer squealed horribly. It looked something like this.
  if (buttonState1 == HIGH) {
   tone(buzzerPin, 440);
  }
  if else (buttonState1 == LOW) {
    noTone(buzzerPin)
}
I repeated this for each output. I was confused until I sat down and wrote out the logical argument and realized the contradiction I was making. By calling "noTone" after each individual "tone," I told the keyboard not to play unless every button was pressed. The fix was simple. Now the "void loop" could be translated as "if button one is pressed, play A, if button 2 is pressed, play C, if button 3 is pressed, play D, if button 4 is pressed, play E, and in any other case don't play anything at all. "
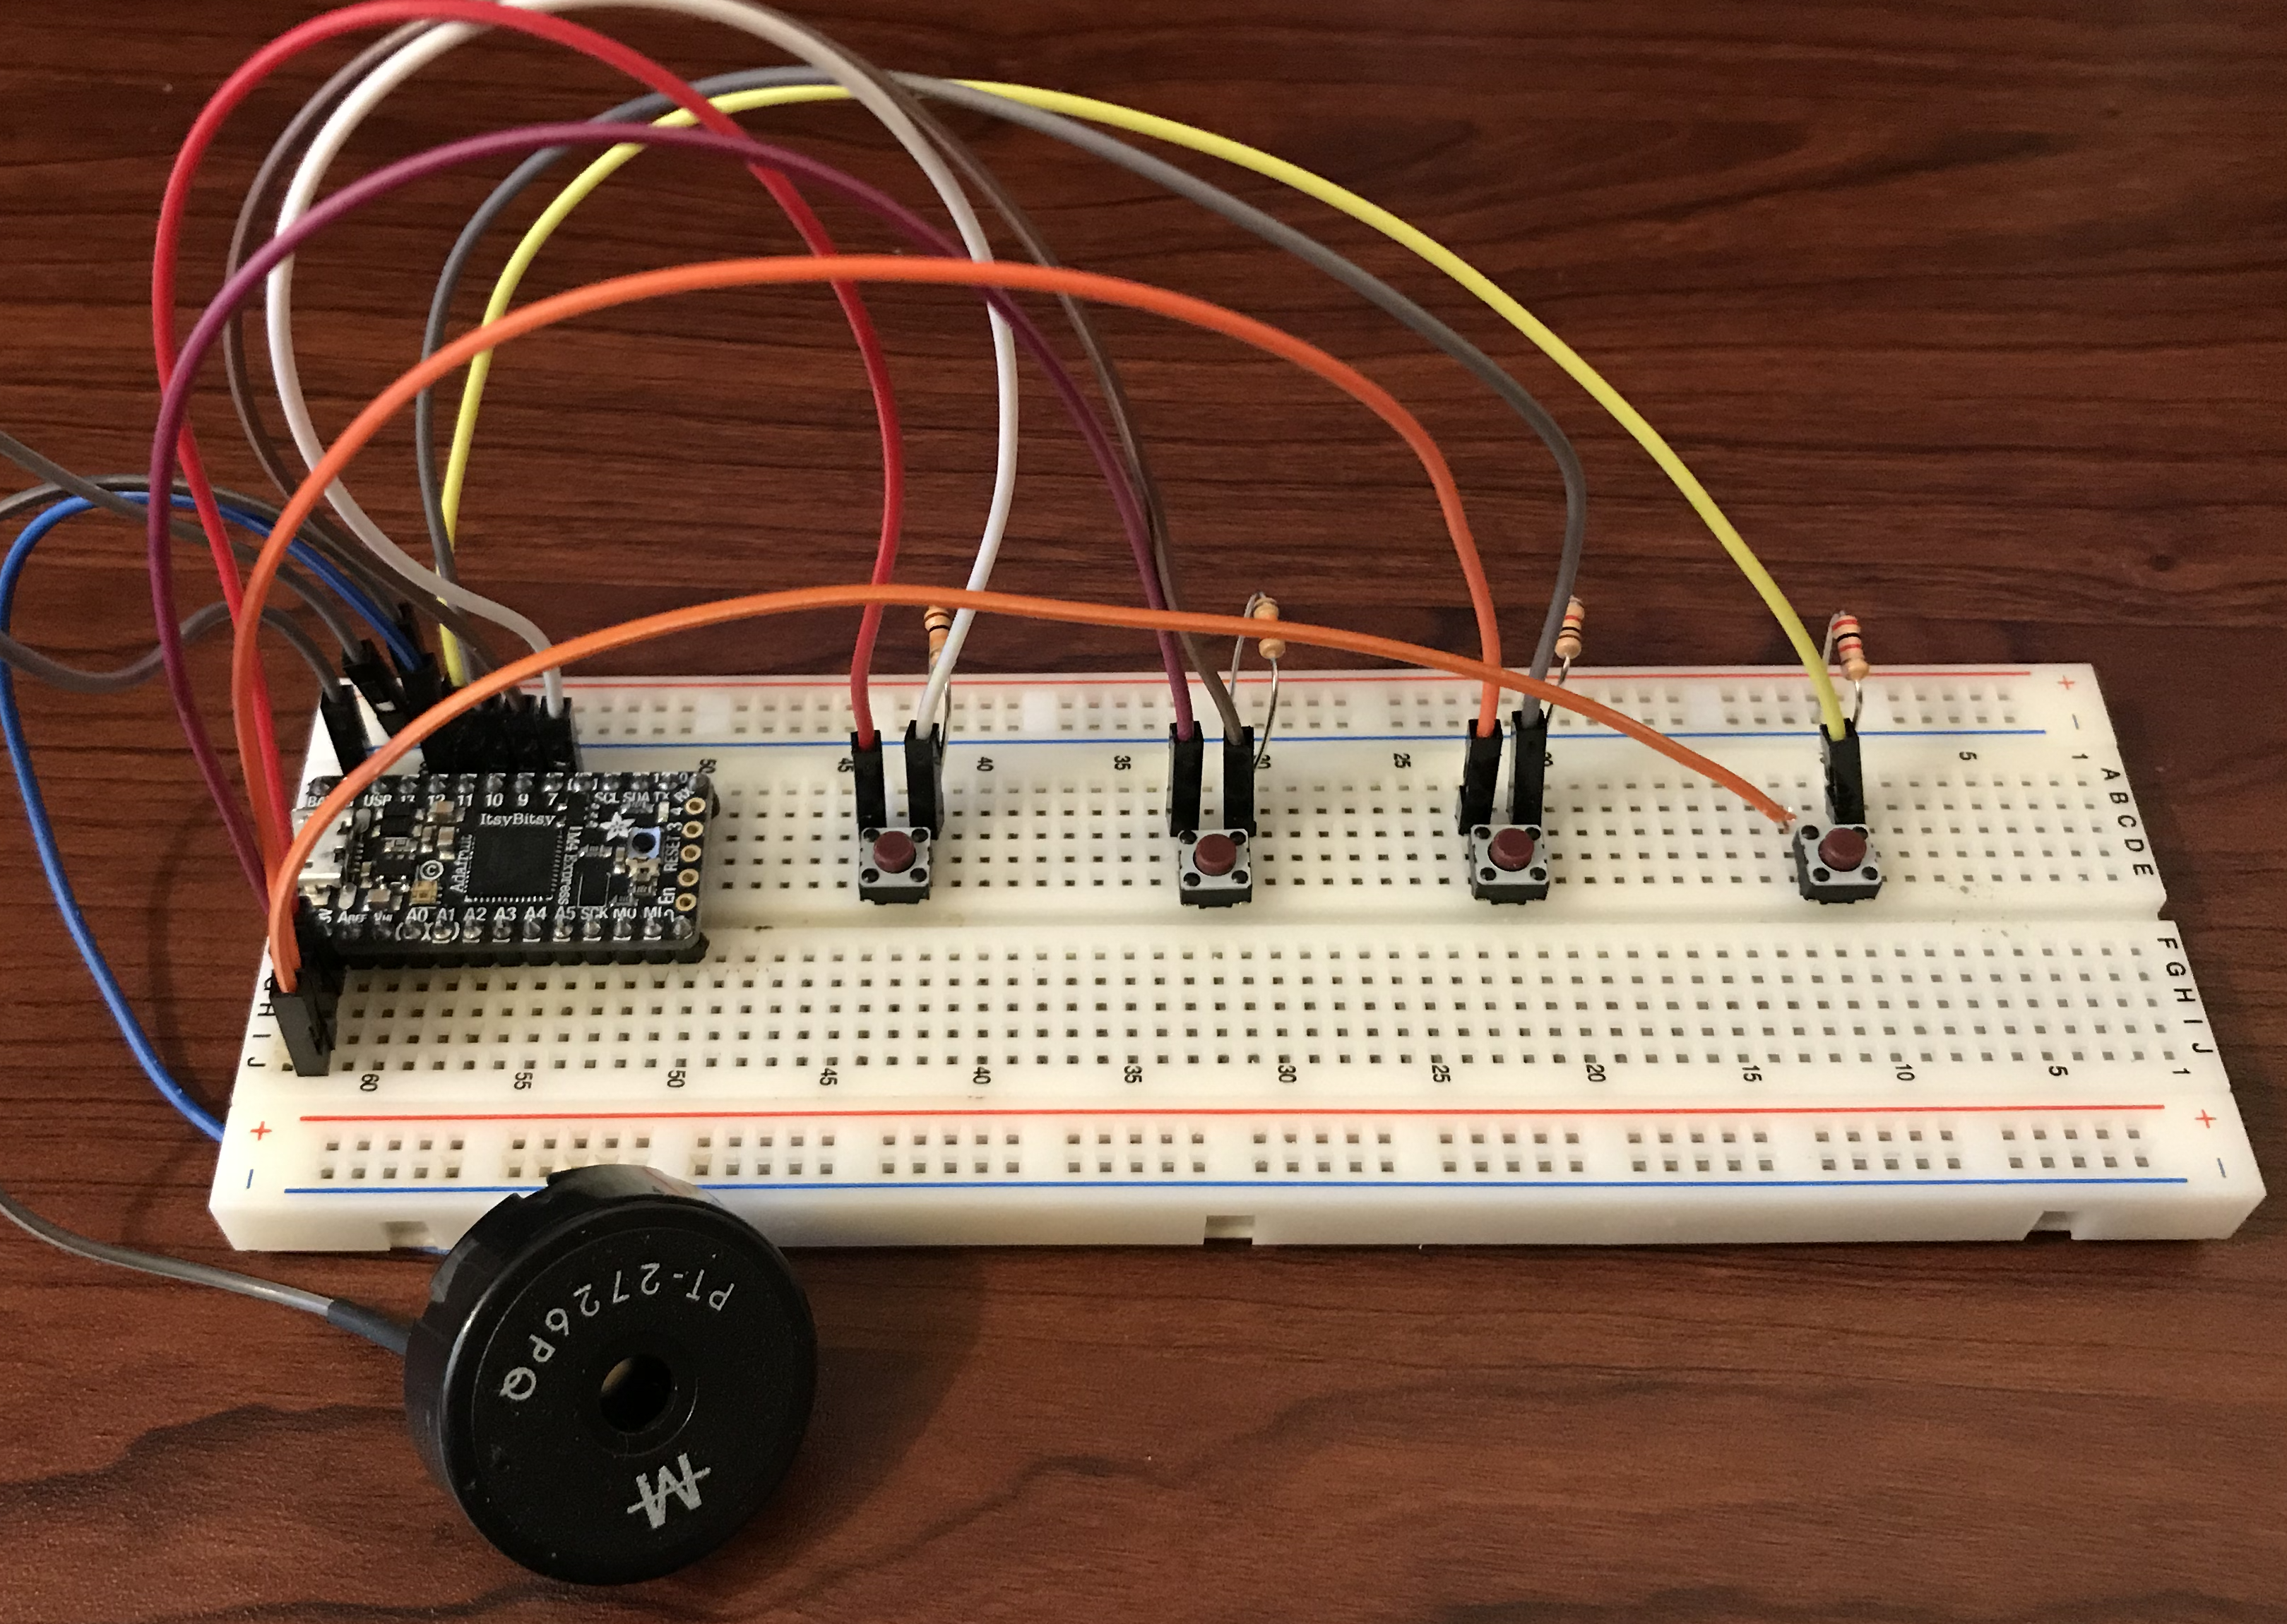
On the ItsyBitsy, the wiring was almost identical, though I ran switches to pins 7, 9, 10, and 11, and ran the buzzer from pin 12.
I created a function, which Alex and I named playSound, in order to help replace the "tone" function.
void playSound(int x){              //set x as variable defining frequency //
  int myDelay = (1/x)*1000;        //calculate period of "x" frequency and convert to milliseconds //
  analogWrite(buzzerPin, 255);
  delay (myDelay/2);
  analogWrite(buzzerPin, 0);
  delay (myDelay/2);
}
"playSound" takes one argument, frequency, converts it to the period of the wave in milliseconds, and then uses that to set delays to create a square wave. Here's the full code.
  // setting the pin numbers//
    const int buttonPin1 = 7;     // key 1 //
    const int buttonPin2 = 9;     // key 2 //
    const int buttonPin3 = 10;     // key 3 //
    const int buttonPin4 = 11;     // key 4 //
    const int buzzerPin = 12;      // buzzer output //

  // defining the original pin states //
    int buttonState1 = 0;         // variable for reading key 1 status //
    int buttonState2 = 0;         // variable for reading key 2 status //
    int buttonState3 = 0;         // variable for reading key 3 status //
    int buttonState4 = 0;         // variable for reading key 4 status //

void playSound(int x){              //set x as variable defining frequency //
  int myDelay = (1/x)*1000;        //calculate period of "x" frequency and convert to milliseconds //
  analogWrite(buzzerPin, 255);
  delay (myDelay/2);
  analogWrite(buzzerPin, 0);
  delay (myDelay/2);
}


void setup() {
  // setting buzzerPin as output //
    pinMode(buzzerPin, OUTPUT);
  // setting button pins as imputs //
    pinMode(buttonPin1, INPUT);
    pinMode(buttonPin2, INPUT);
    pinMode(buttonPin3, INPUT);
    pinMode(buttonPin4, INPUT);
}

void loop() {
  // read the state of the pushbutton value //
    buttonState1 = digitalRead(buttonPin1);
    buttonState2 = digitalRead(buttonPin2);
    buttonState3 = digitalRead(buttonPin3);
    buttonState4 = digitalRead(buttonPin4);

 if (buttonState1 == HIGH) {
 playSound(440);
  }
  else  if (buttonState2 == HIGH) {
 playSound(523.25);
   }
  else if (buttonState3 == HIGH) {
 playSound(587.33);
  }
  else if (buttonState4 == HIGH) {
 playSound(659.25);
  }
  else{
  analogWrite(buzzerPin, 0);
  }
}
While each button does still make a unique sound, they are not the sounds I expected or hoped for. Instead of monophonic squarewaves, the buttons now trigger strange, almost bitcrushed, sounds. Here is each button played, from 1 to 4.
I'm excited to continue working on this project and to learn why "playSound" isn't yet creating the sounds I want it to. I've made a cheesy little riff with the Nano and layered over some even cheesier synth parts just to hear the brash little piezo keyboard in context. I'm also looking forward to sampling the strange noises of the ItsyBitsy to use in another musical context. I'll be uploading both here soon!